
How to take a full page screenshot on iPhone
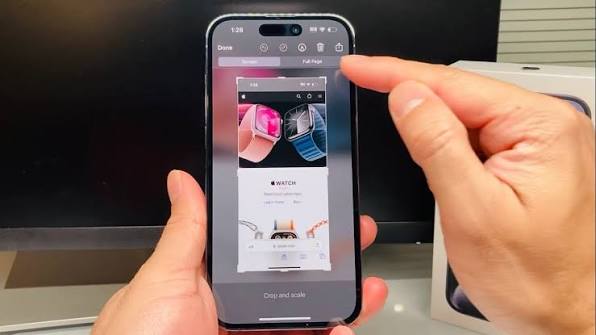
New Delhi: Instead of saving multiple cropped screenshots on your iPhone, you can capture a full page. You can capture the entire page at once, save it as a PDF, and use it when needed. This is very useful if your library is already full. Furthermore, it can also be helpful if you can’t figure out which screenshot was taken first. Today, we’re talking about one such feature: the small preview option in the corner. There’s also a full page option. This changes the way things are saved. This allows the entire webpage to be saved in one place instead of being divided into separate parts. Let’s explore this in detail.
How to Take a Full-Page Screenshot on an iPhone
You can take a screenshot of content that exceeds the size of your iPhone’s screen, such as an entire webpage in Safari.
On iPhones with Face ID, quickly press and release the Side button and Volume Up button simultaneously.
On an iPhone with a Home button, quickly press and release the Side button and Home button simultaneously.
Then tap Full Page.
Then follow these steps:
Scroll Down: Drag your finger on the preview image on the right to view more of the screenshot.
Crop: Tap the Crop button and then drag the handle to save only the portion you want.
Save as Image: Tap the tick button and then tap Save to Photos.
Save as PDF: Tap the tick button and tap Save PDF to Files and then select a location.
Cancel or Delete: Tap the cross button.
Screenshots should be saved as images or PDFs, or full-page screenshots should be saved as PDFs.
This keeps the content intact and makes it easier to read. You can save it to Files, select a folder, and view it later. If you save it as an image, it goes to Photos, but it can be difficult to manage there.